Quick Links

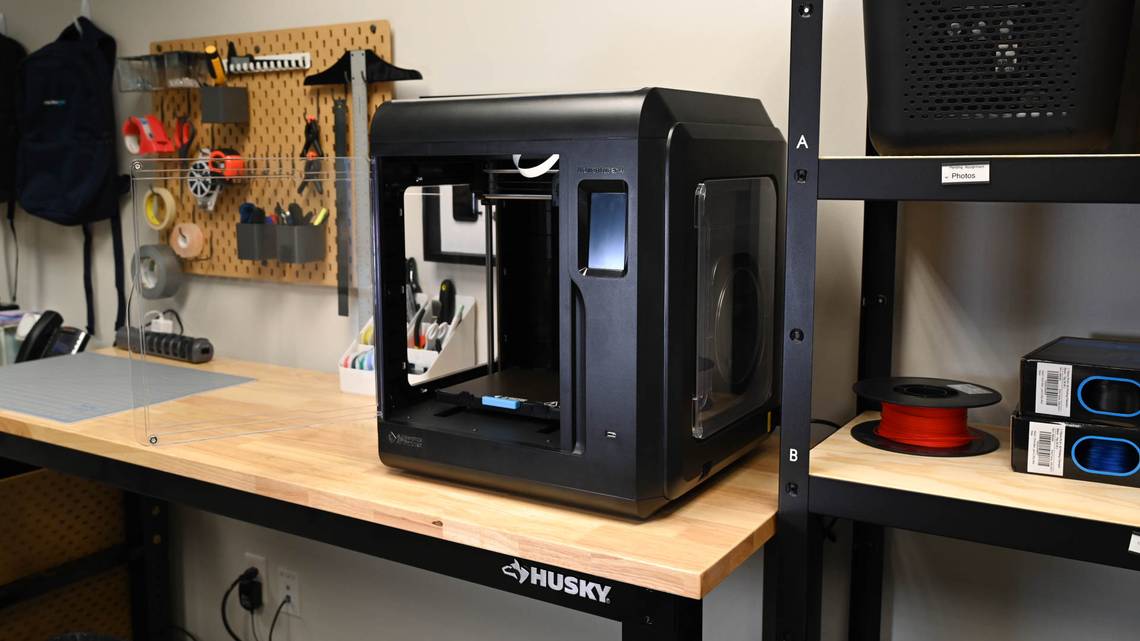
If you're into 3D printing, eventually, you'll want to make a larger print that won't fit on an entry-level printer. But might not feel comfortable buying a large 3D printer that requires fussing and fidgeting to produce decent results. If that's you, check out FlashForge's Adventurer 4 printer.
This printer is very similar to FlashForge's Adventurer 3. I reviewed the Monoprice Voxel printer a while back, which is essentially a re-badged Adventurer 3 and liked it a lot. The Adventurer 4 is an FDM (Fused Deposition Manufacturing) Printer that lays down one layer of melted plastic filament at a time to build up a 3D object. These have become common over the past several years and can be found in many places like schools, libraries, and homes.
As a general rule, FDM printers are fairly easy to use, with slicer software that turns a 3D model into code, called gcode, that the printer can use to create a solid representation of the model. And 3D printer prices have fallen considerably over the past several years, with many models available for less than $200.
Pricey But Worth It

The Adventurer 4's price tag, at $749, is quite a bit higher than entry-level machines in the under $400-$500 range. There are several reasons for this. One of them is the versatility of the materials the printer can use. Many entry-level printers are limited to a plastic called PLA because the hotend, the part of the printer that actually melts the filament, won't get hot enough to melt many of the other types of available materials such as ABS, PETG, and TPU. Less expensive printers also tend to have unheated build platforms, the place where the object is actually built upon. Heating this build platform is often necessary with larger prints to reduce or eliminate warping, where the object's edges lift off the build plate, distorting and ruining the print. Having these capabilities is what sets the Adventurer 4 apart from many less expensive printers.
Finally, a third factor in the pricing of many printers is the size of the build platform itself. Typically, build size is given in millimeters rather than inches, which can be a bit confusing without heading for a conversion website. To provide some insight, the build volume of the Adventurer 3. which is a smaller version of the Adventurer 4, is 150 x 150 x 150 mm, which is a cube just under six inches on a side. The build volume of the Adventurer 4 is quite a bit larger, measuring 220 x 200 x 250 mm, or a large 8.7 x 7.9 x 9.8 inches. While that's large enough to print many of the larger models, if you want to print something like a helmet, you'll have to do it in several pieces and glue them together. There are 3D printers that can print something as large as a helmet, but they are considerably more expensive--over $1,000.
Ready Right Out of the Box
Setting up the Adventurer 4 for the first print couldn't be easier. The printer is completely assembled right out of the box, so all you need to do is remove some of the packing materials, load the enclosed filament sample, and it's just about ready to do your first print. That beats having to unpack parts, assemble them, and hope that you've done it right--something many other 3D printers require.
The Adventurer 4 comes with a number of tools that you may need as you continue to use the printer. These include a screwdriver, hex key set, an unclogging pin (if the nozzle gets clogged), some extra filament guides in the event the guide in the feed path needs replacing, a card used for aligning the print head, an extra nozzle, a USB flash drive with the slicing software, manual in PDF format, a model to perform a test print, and a 1Kkg spool of filament to get you started printing.
A Fast First Print

Since the printer comes fully assembled, you just need to unpack it, and you are almost ready to start your first print. I say almost, as it's a good idea to perform a calibration first. You won't have to calibrate the printer very often, though Flashforge notes that if you remove the flexible print bed, it's a good idea to perform a calibration before you perform another print.
Flashforge claims that the Adventurer 4 performs an automatic calibration. It doesn't. While the print head moves to nine locations above the print bed during the calibration process, I had to manually calibrate the Z-axis at each location by lowering or raising the print head so that the supplied calibration card fits under the print head and was removable with just a slight bit of friction. That's definitely a minus, as most 3D printers these days, especially those in the same price range, perform this calibration completely autonomously. It's an annoyance but not a deal-breaker.
Once calibrated and with the sample filament loaded, you're ready to install the slicing software. Flashforge's own proprietary software can be installed from the USB drive that's included, or you can install Cura, which is the slicer most often used for FDM 3D printing. To use Cura with an Adventurer 4, you will have to change some of Cura's parameters, so Flashforge's own FlashPrint slicer is the way to go, at least initially. I thought Flashprint was actually a little bit easier to use than Cura, especially for someone fairly new to 3D printing. I did all of my testing using Flashprint and was very satisfied with both the quality of the prints and the user experience.
One last thing you'll have to do before printing your own models is to decide how to connect the printer to the PC. The manual lists several ways to do this, including WI-Fi, Ethernet, and using a USB flash drive in the USB port. Unfortunately, I was unable to get the printer connected using Wi-Fi but had no trouble printing over Ethernet or from a USB flash drive. I had better luck with the embedded camera, which can be accessed from a web browser. This allows you to keep an eye on the progress of a print without being in the same room.
Prints Look Great
It really doesn't matter how easy a 3D printer is to use if the prints that you can create aren't useful or accurate. That's not a problem with the Adventurer 4. I printed more than a dozen prints using a variety of vendor filaments, and every one of them was of excellent quality. One of the most useful for review purposes is a test object developed jointly by Kickstarter and Autodesk. This test object lets you test multiple aspects of 3D printing as well as quantities the results of the evaluation. A perfect score is 25. The Adventurer 4's output scored 22, which is excellent.

Some of the parts of the Kickstarter/Autodesk test print that are evaluated are the five posts on one edge. On a perfect print, all five of these posts would be removable by hand. On my test print, four out of the five were removable with the leftmost post firmly entrenched in the hole. The only other viable flaw in the test print was some slight stringing on one of the spires at the top of the print. Stringing is often caused by a retraction setting. When the print head is moved from one place on the print to another, the filament is withdrawn or retracted into the extruder. If it isn't retracted enough, some of the molten filament causes a string. This is easily addressed by adjusting the retraction setting in the slicer software.
Other benchmark objects, including the popular 3D Benchy, printed with no visible flaws. And all of the test prints I printed popped right off of the print bed. I just had to remove the build plate and flex it.
The Bottom Line
Aside from the fact that I couldn't get Wi-Fi to work and the need to manually calibrate the printer occasionally, I really enjoyed printing with the Adventurer 4. It has virtually no setup before you can start printing, a large print area, and excellent print quality. The price is a bit steep, but not unreasonable for what you get. Given its capabilities and ease of use, the Adventurer 4 is equally a good choice for both beginners and those with more experience who need to produce larger prints.

Flashforge Adventurer 4 Let's You Easily Make Larger 3D Prints
- Easy to set up and use
- Can load files via Ethernet, WI-Fi, or USB drive
- Flexible build plate makes it easy to remove print
- Supplied with an extra nozzle assembly
- Very easy to change and replace nozzle
- Entire print assembly is enclosed
- Slicing software could be better
- Wi-Fi wouldn't set up
- Calibration is manual, not really automatic
- Needed to calibrate after every time removing build plate